Radio & Bluetooth Settings
Sections:
- Lab Topology
- RF Profile Overview
- RF Profile Configuration
- Assigning RF Profiles
- Bluetooth Settings
- Hotspot 2.0 Overview
Resources:
- RF Profiles
- Meraki Auto RF - WiFI Channel & Power Management
- Band Steering
- Wi-Fi 7 (802.11be) Technical Guide
- Bluetooth Low Energy (BLE)
- ESL Integration with MR Access Points
- MR MQTT Data Streaming
- Hotspot 2.0 Overview
- Hotspot 2.0 Configuration Example
Overview:
- Meraki MR RF profiles are a set of optional configuration settings that allow you to control and optimize the radio frequency (RF) behavior of your Meraki MR access points across the network
- These profiles are designed to help ensure optimal wireless performance by managing various RF parameters, such as power levels, channel selection, and more
- In this section, I will demonstrate implementing and managing RF profiles for my Meraki access point
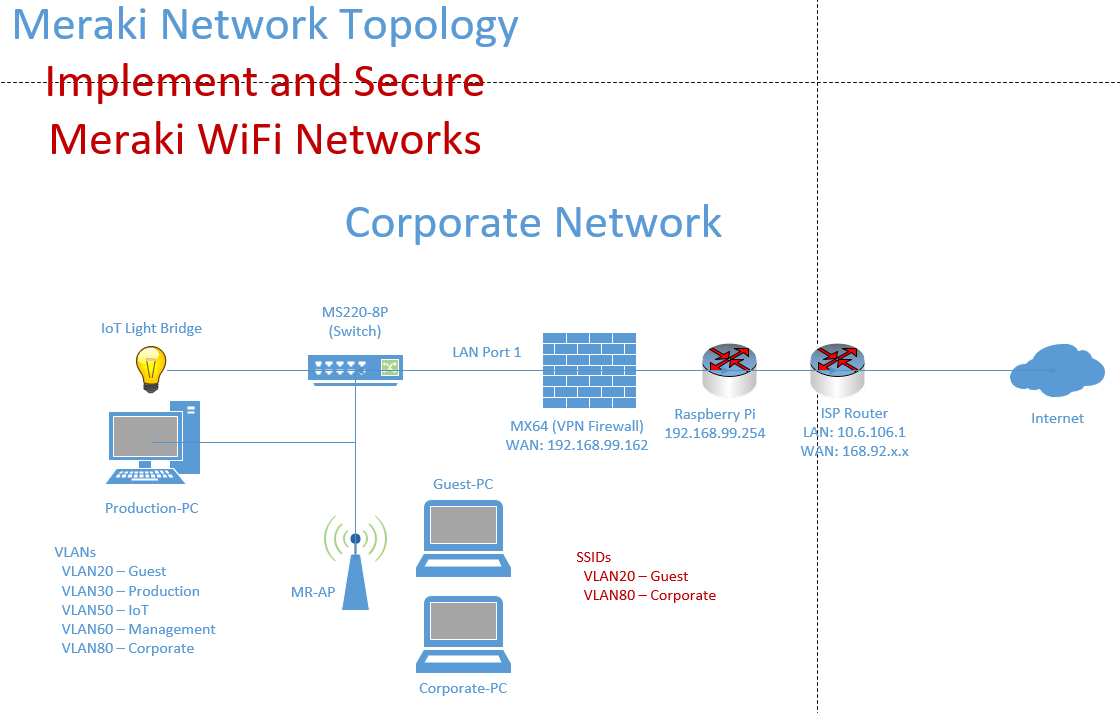
Lab Topology
RF Profile Use Case & Types
RF Profile Use Cases:
Large Networks
If you manage multiple Meraki MR access points across a large deployment, RF profiles can help maintain consistent and optimized wireless performance across the network
High-Density Areas
In places with high client density (such as conference rooms or stadiums), RF profiles help optimize performance by balancing traffic and minimizing interference
Custom Envrionments
RF profiles can be implemented for specific environments (open spaces, narrow hallways, outdoor areas) that may require unique RF settings
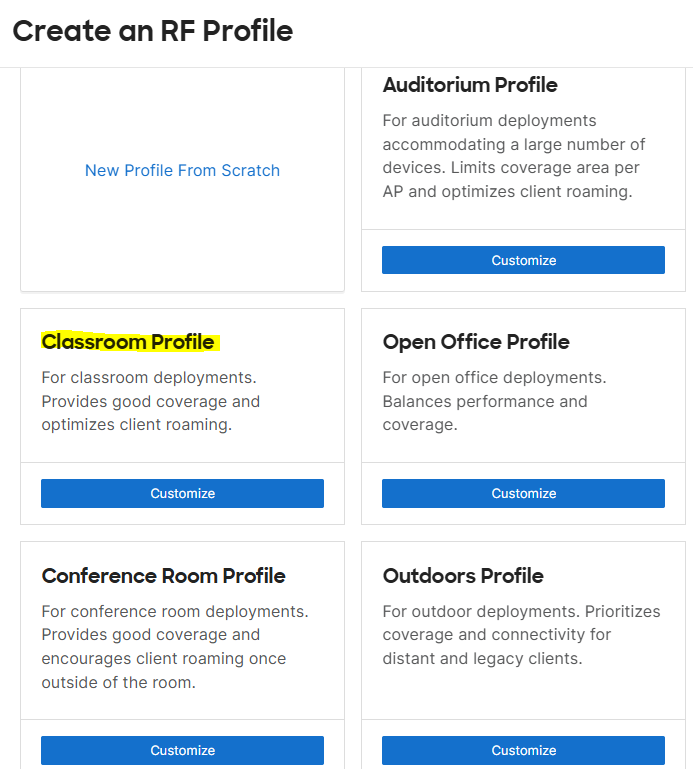
RF Profile Types:
- Cisco Meraki offers five predefined templates to help admins quickly configure wireless settings for maximum performance
- After creating or selecting a specific RF profile through the Meraki Dashboard, these settings can then be applied to certain APs or groups of APs
Auditorium
Per Cisco, this profile is designed for open auditorium deployments accommodating a large number of devices. TX power is in the lower range
Classroom
Per Cisco, this profile is designed to accommodate a medium number of devices in a classroom. TX power is in the lower range
Open Office
Per Cisco, this profile is designed to accommodate a medium number of devices in an open office environment. TX power is in the medium range
Conference Room
Per Cisco, this profile is designed to accommodate a medium number of devices in an open office environment. TX power is in the lower range
Outdoors
Per Cisco, this profile is configured to accommodate outdoor deployments. TX power is in the high range
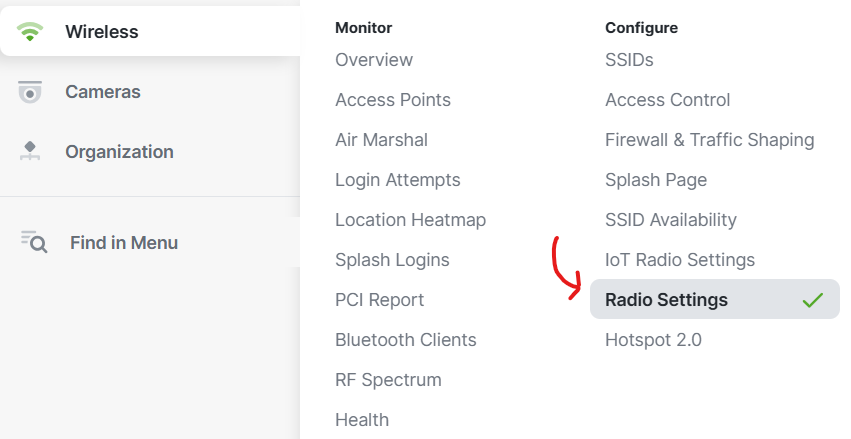
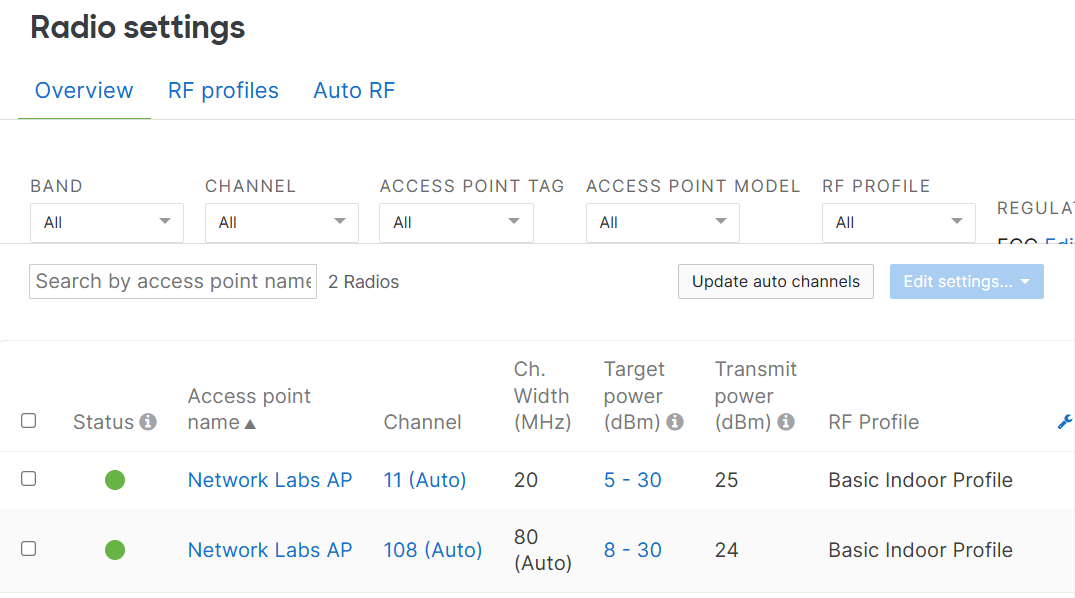
Radio Settings Menu
Radio Settings Overview
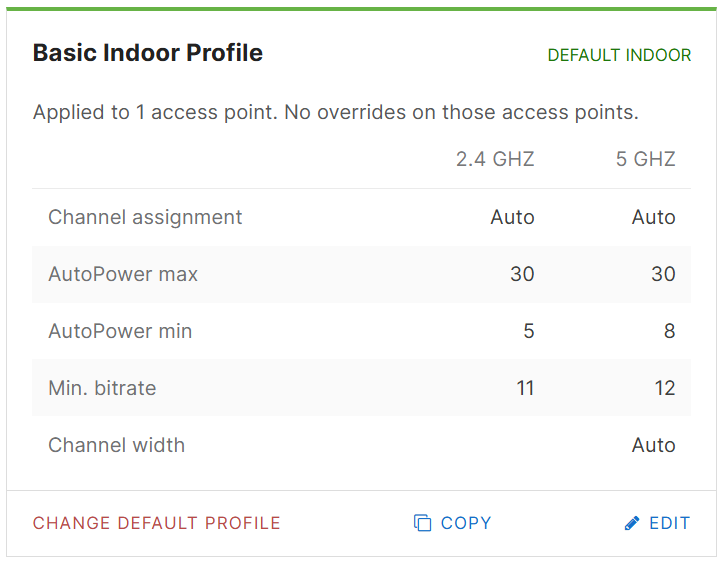
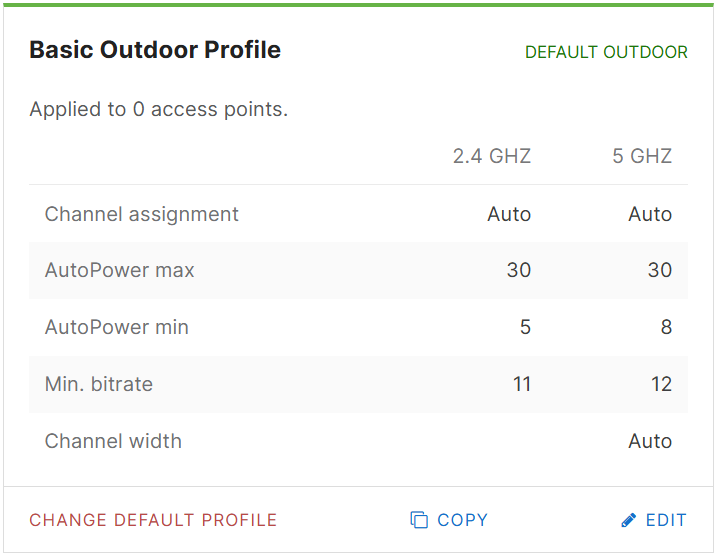
Default Indoor/Outdoor Profiles
RF Profile Configuration
Overview:
- In this section, I will demonstrate defining a new RF profile for my home lab environment and discuss the available features of an RF profile
Classroom Profile for my home office setup
General Feature Settings:
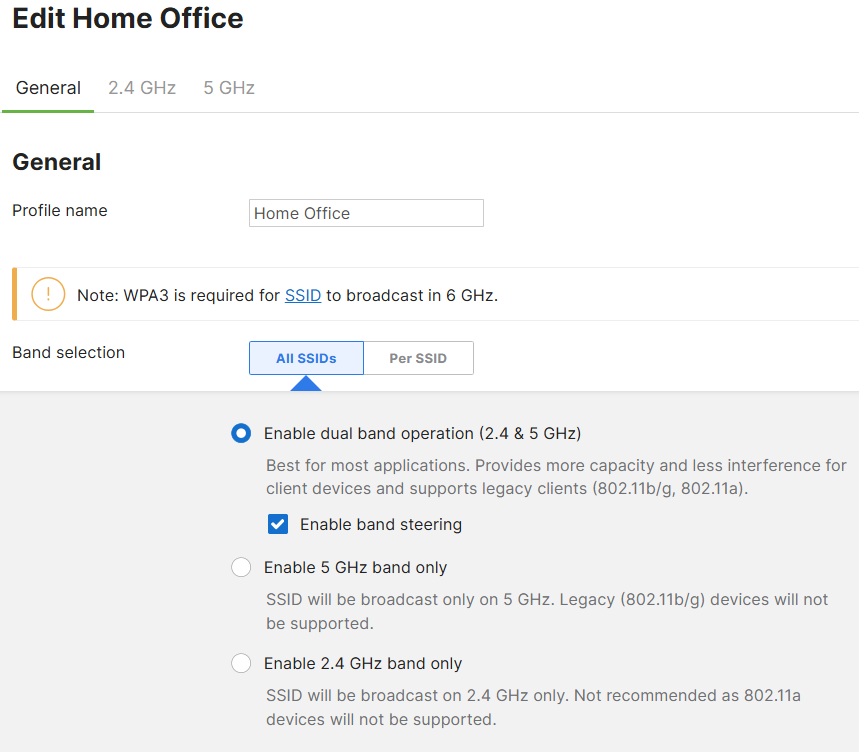
Profile Name
- In the General section, you have the ability to name the RF profile and select the band most suitable for your network environment
Band Selection/Steering
- Meraki's Band Steering feature is designed to optimize the connection of dual-band clients that support both 2.4 & 5GHz WiFi bands to the most appropriate band
- The goal of Band Steering is to ensure clients with the capability to connect to the 5GHz band are steered away from the 2.4 GHz band, which is generally more congested
General Feature Settings (continued):
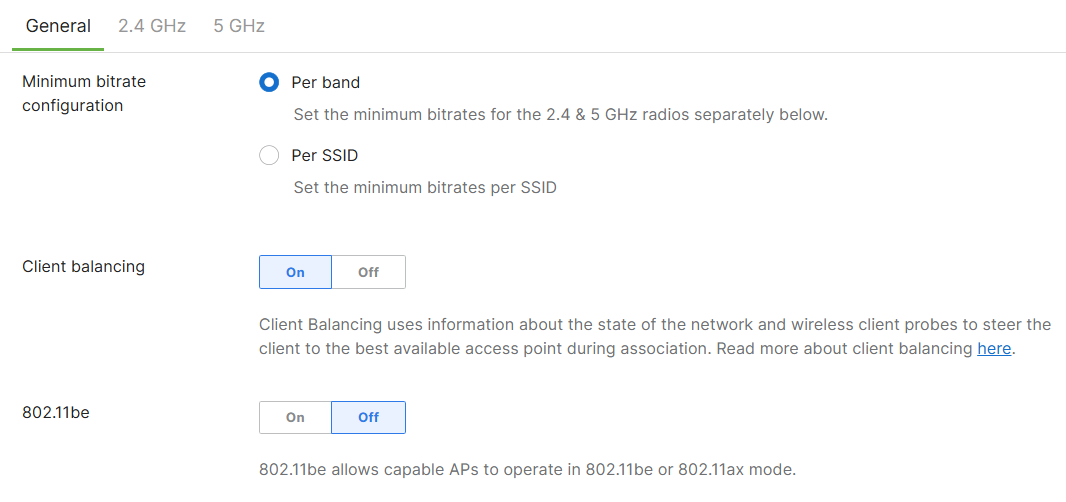
Minimum Bitrate Configuration
- By enabling this setting, it allows you to define the lowest bitrate at which devices can connect to the wireless network for optimizing network performance
- By setting a minimum bitrate, you can ensure that devices only connect if they maintain a certain level of performance
- Setting a minimum bitrate can avoid issues such as client devices at the edge of the coverage area experiencing weaker signals
- Per Cisco, it is recommended to use minimum bit rates per band to avoid coverage holes if implementing per SSID
Client Balancing
- This feature helps evenly distribute connected clients across multiple access points within a network
- The goal is to optimize the overall performance of the wireless network by preventing certain access points from becoming overloaded while others are underutilized
802.11be
- 802.11be is also known as Wi-Fi 7, the upcoming WiFi standard that is designed to enhance wireless network performance in environments that demand high throughput, low latency, and high efficiency
2.4 GHz Settings:
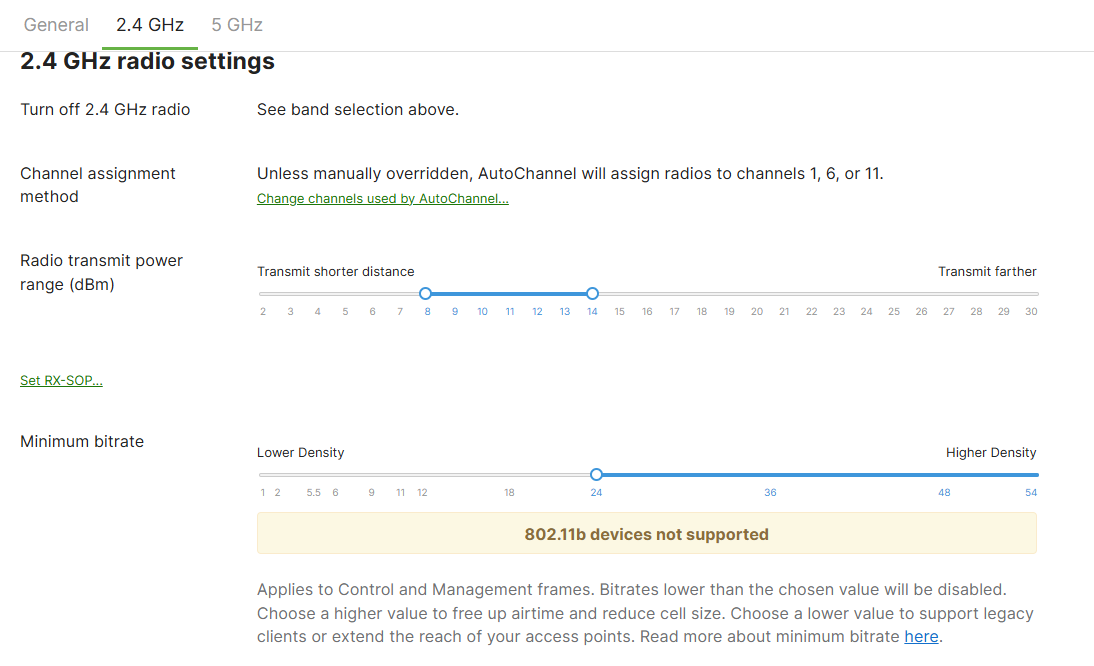
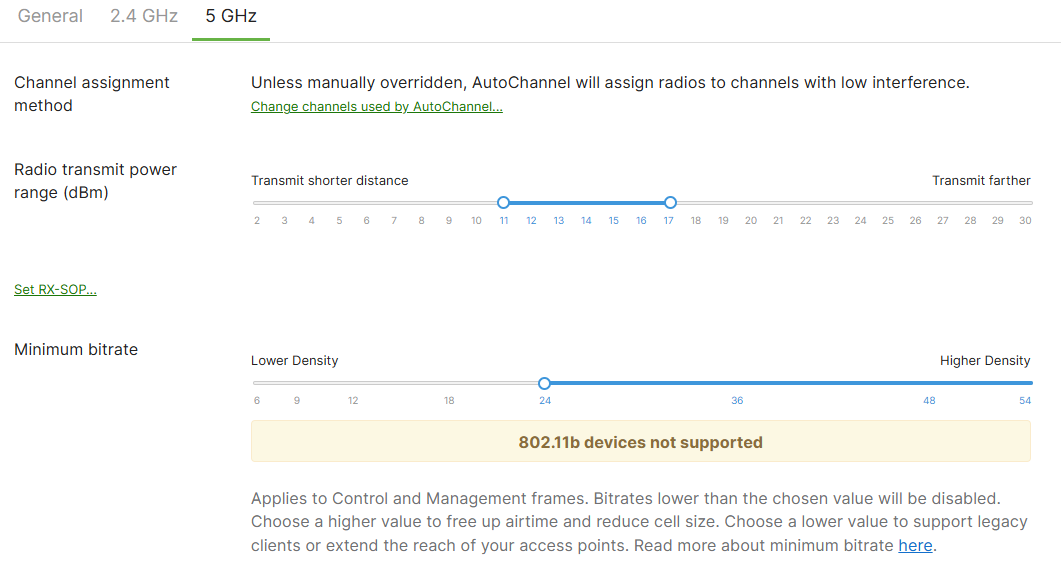
Channel Assignment Method
- Meraki gives admins the ability to manually select the channels used in Meraki's 'Auto Channel' for the 2.4 and 5 GHz bands respectively
- Auto Channel dynamically adjusts the channels of the client serving radios to avoid RF interference
- The default Auto Channel is generally a good baseline for most wireless networks but can be adjusted manually if needed
- Proper channel assignment is important for optimizing wireless performance by minimizing interference, avoiding overlapping channels, and ensuring efficient use of the available spectrum
Radio Transmit Power Range (dBm)
- This setting refers to the adjustable power level that the access point uses to transmit its wireless signals
- This setting also plays a crucial role in controlling the coverage area and ensuring optimal performance for connected clients
- Meraki is integrated with a AutoTX Power solution that automatically adjusts the transmit power of access points in real-time based on environmental conditions however it may be necessary to limit the range depending on the requirements
Minimum Bitrate
- If the Minimum Bitrate is enabled 'per band' from the General section, this is where the value can be configured and optimized for the 2.4 and 5 GHz bands
5 GHz Settings:
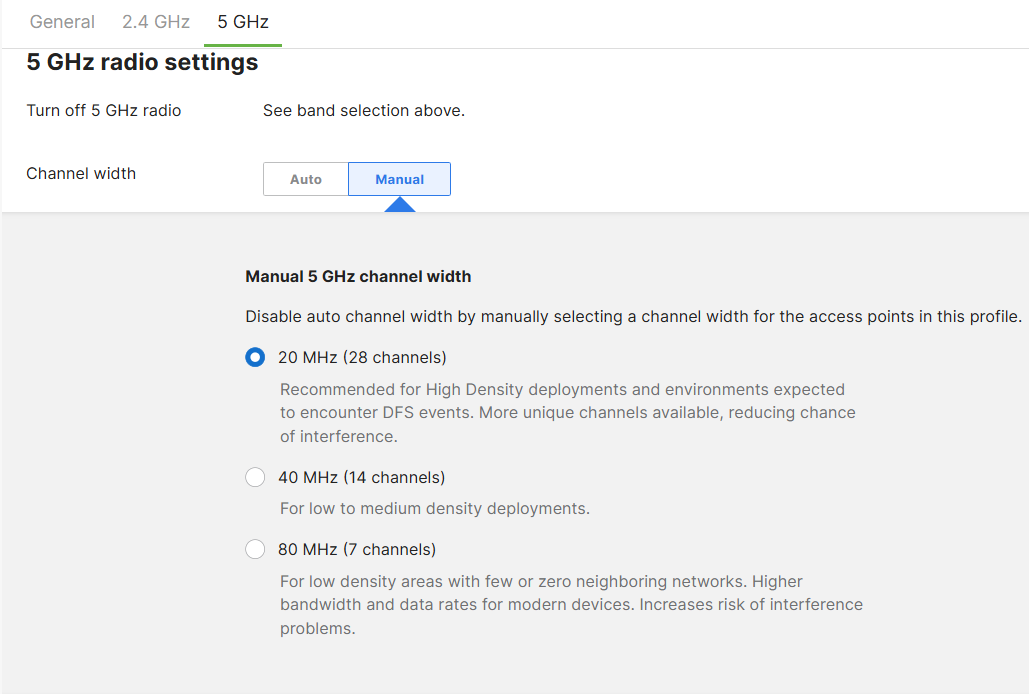
Channel Width
- Meraki MR access points support a variety of channel widths in the 5 GHz spectrum you can choose from depending on the trade-offs between performance, range, and interference
- This setting can be left at Auto which will adjust the width of the 5 GHz radio based on the Auto Channel algorithm
- The 2.4 GHz band utilizes 20MHz channel widths which helps minimize overlap with other access points running the 2.4 GHz band due to the limited channels available
- With 5 GHz, the amount of channels available exceed the 2.4 GHz band, allowing the use of wider channel widths to support higher data throughput
Additional Settings
- Comparing the 5 Ghz to the 2.4 GHz band, you are also able to adjust the channel assignment method, radio TX power range, and minimum bitrate values that best suit your network environment
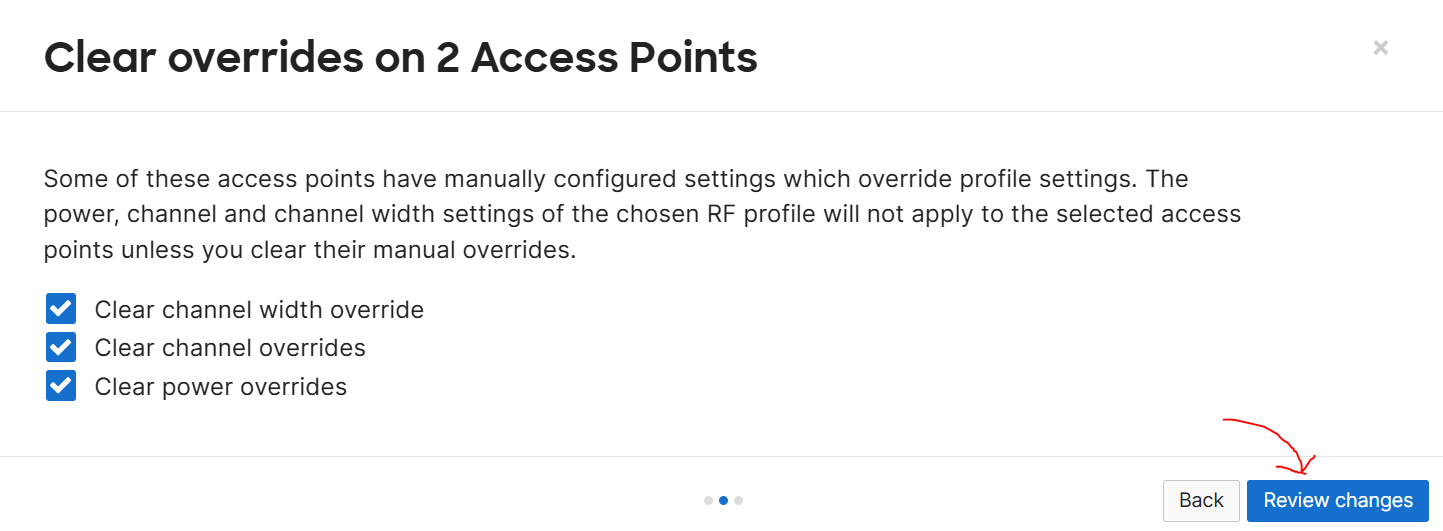
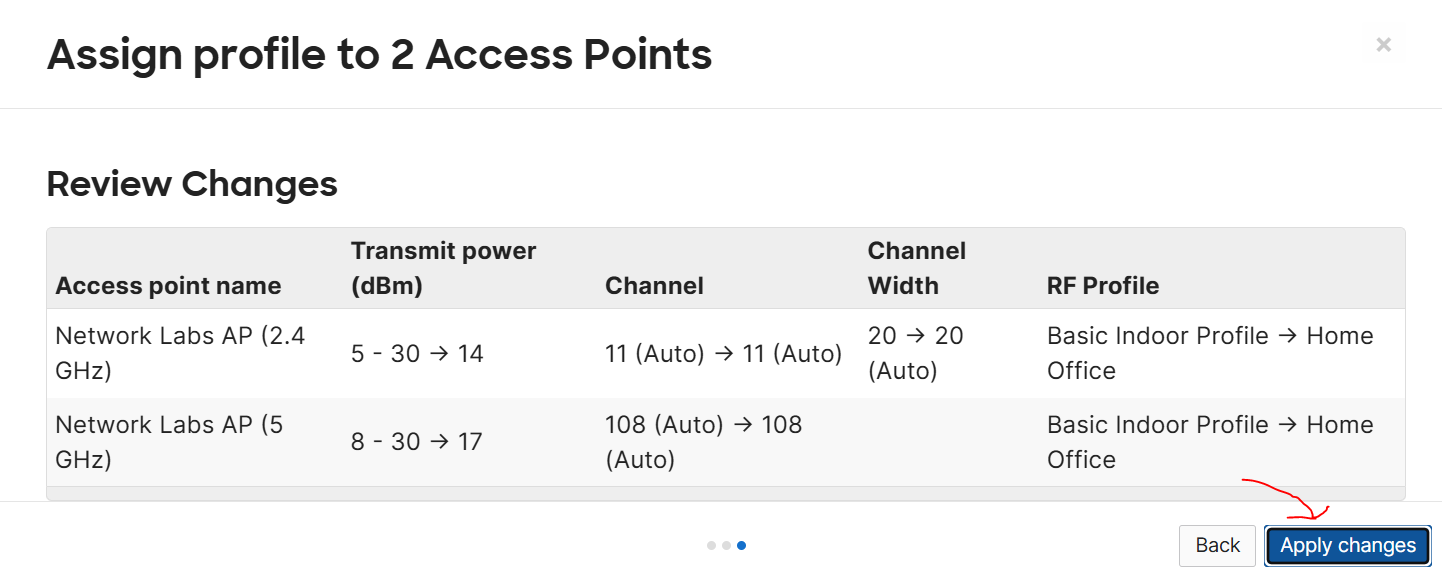
Assigning RF Profiles
Overview:
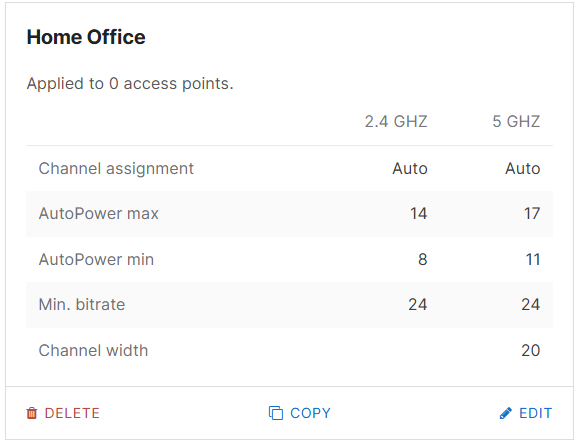
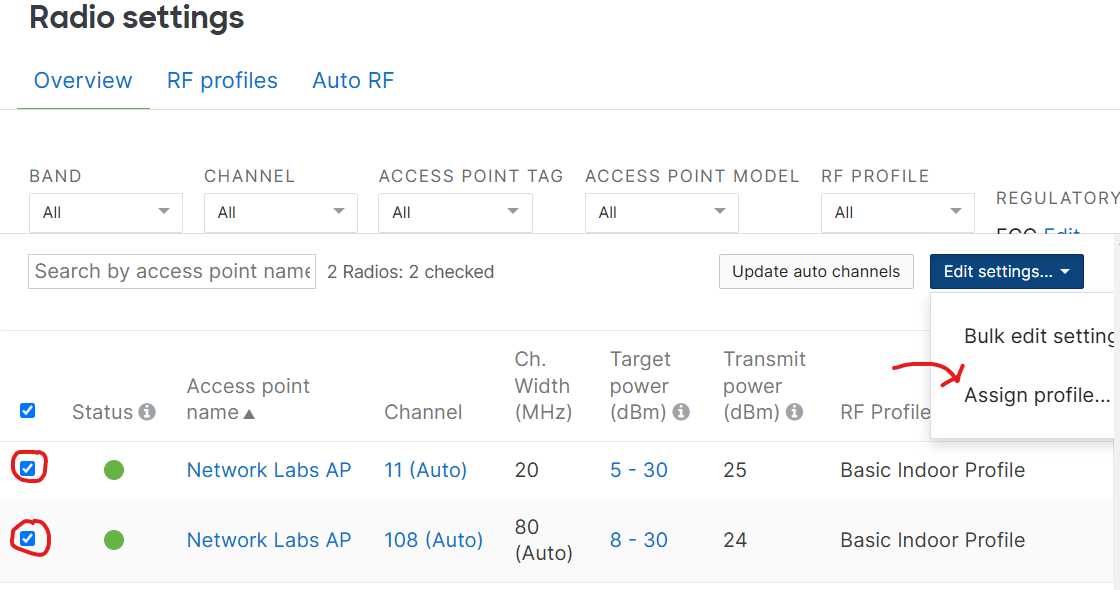
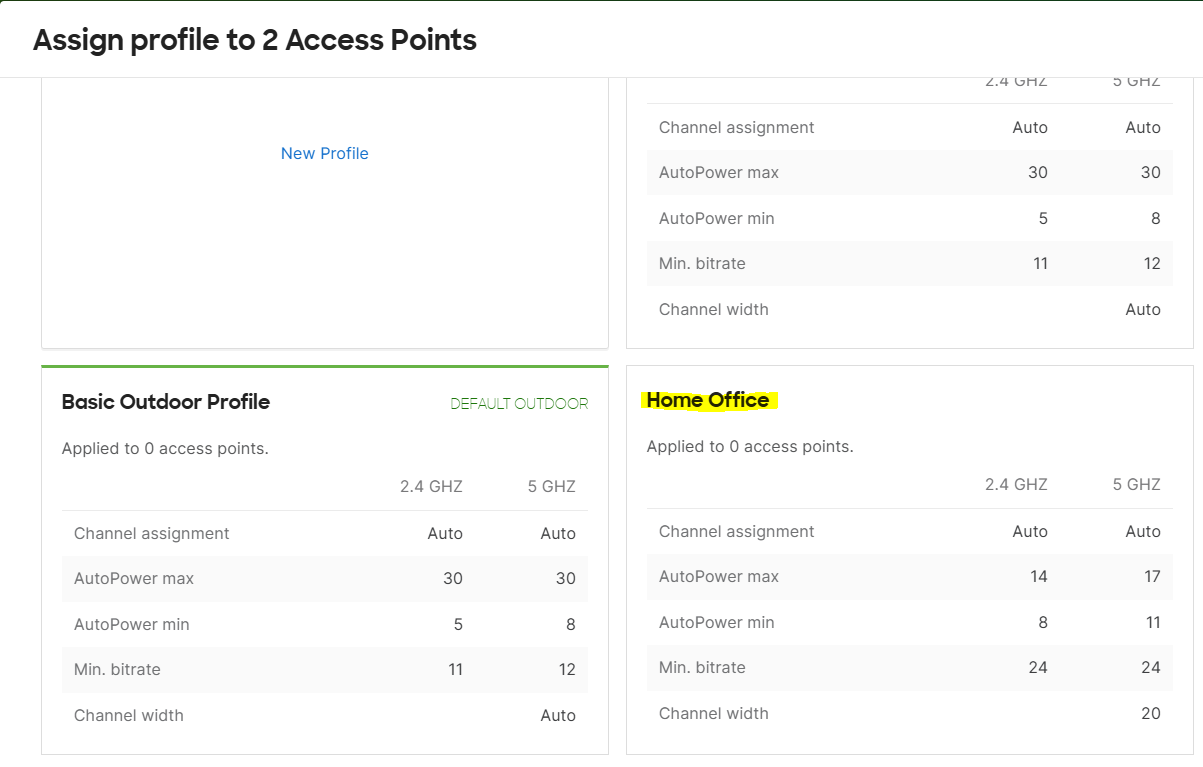
- In this section, I will demonstrate assigning the RF Home Office profile I have defined in the previous section to my home lab Meraki access point
- RF profiles can be assigned to a specific AP or multiple APs from the Meraki Dashboard
- When applying RF profiles to access points, admins have the option to retain certain settings
Defined Home Office RF Profile
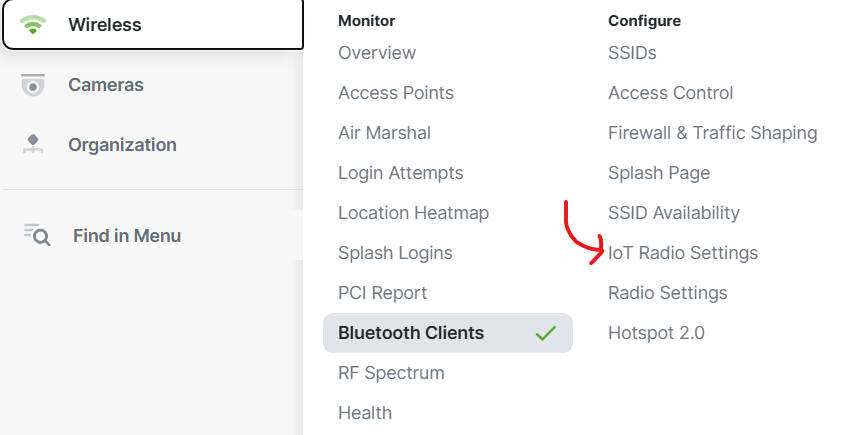
IoT Radio Settings
Overview:
- The IoT settings for Cisco Meraki MR access points are designed to help manage and optimize wireless connectivity for IoT devices
- These settings allow admins to configure their network to better support IoT devices, which often have specific requirements for connectivity, such as low power, reliable connections, and minimal interference
- Meraki, integrated with Bluetooth Low Energy radio, has the ability to transmit BLE beacons as well as scan and locate BLE devices such as BLE asset tags and devices such as fitness monitors that communicate using the BLE protocol
- Meraki is also known for its Bluetooth location API, which allows third party applications to provide asset tracking and analytics using battery based Bluetooth tags or wearables like fitness monitors
- In summary, Meraki's Bluetooth integration provides location based services, proximity marketing to customer devices, and proximity sensing such as unblocking a door, initiating a device connection, or recording attendance
- In this section, I will enable the Bluetooth Low Energy radio via the Meraki Dashboard to scan for nearby Bluetooth devices around my home environment
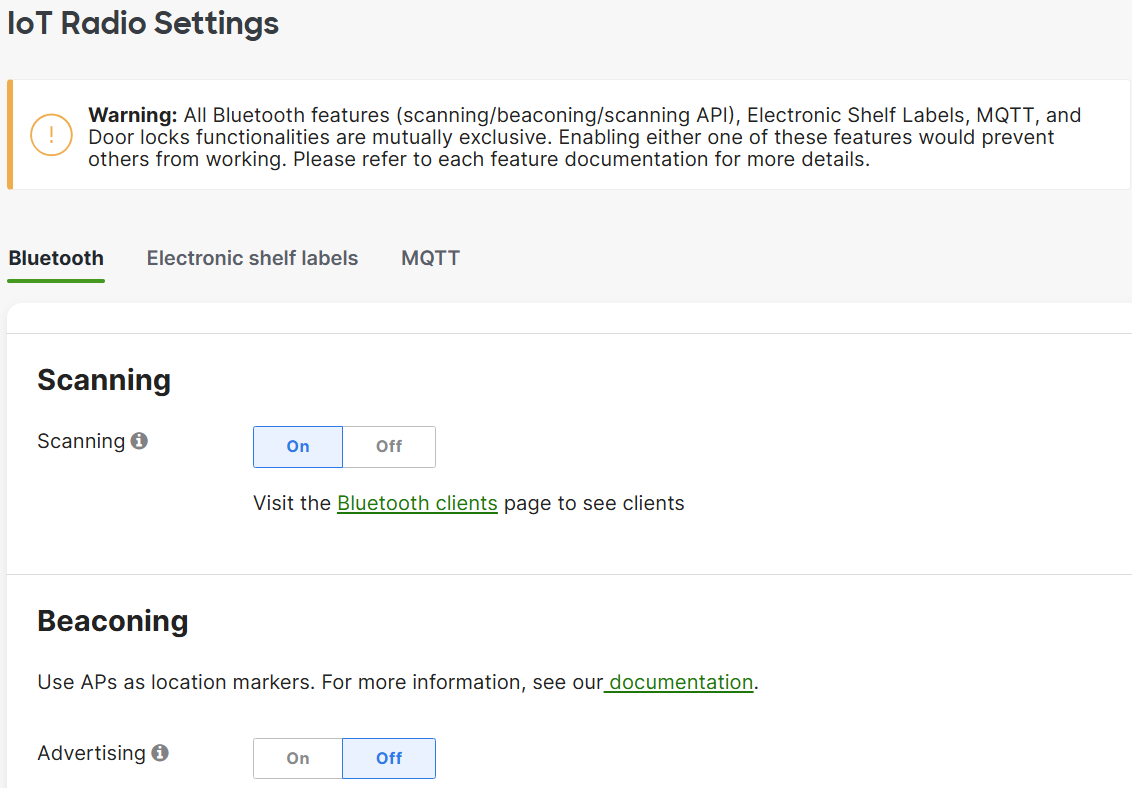
Bluetooth Beaconing:
- With Bluetooth Beaconing, MR access points emit BLE signals periodically to broadcast a unique identifier along with other information
- These beacons can be detected by mobile devices or other BLE-enabled receivers within range
- These devices can then take action based on the signal, such as displaying a notification, sending data, or triggering an event
IoT Radio Settings Menu
IoT Radio Setting for Bluetooth Overview
Enabling Bluetooth Scanning
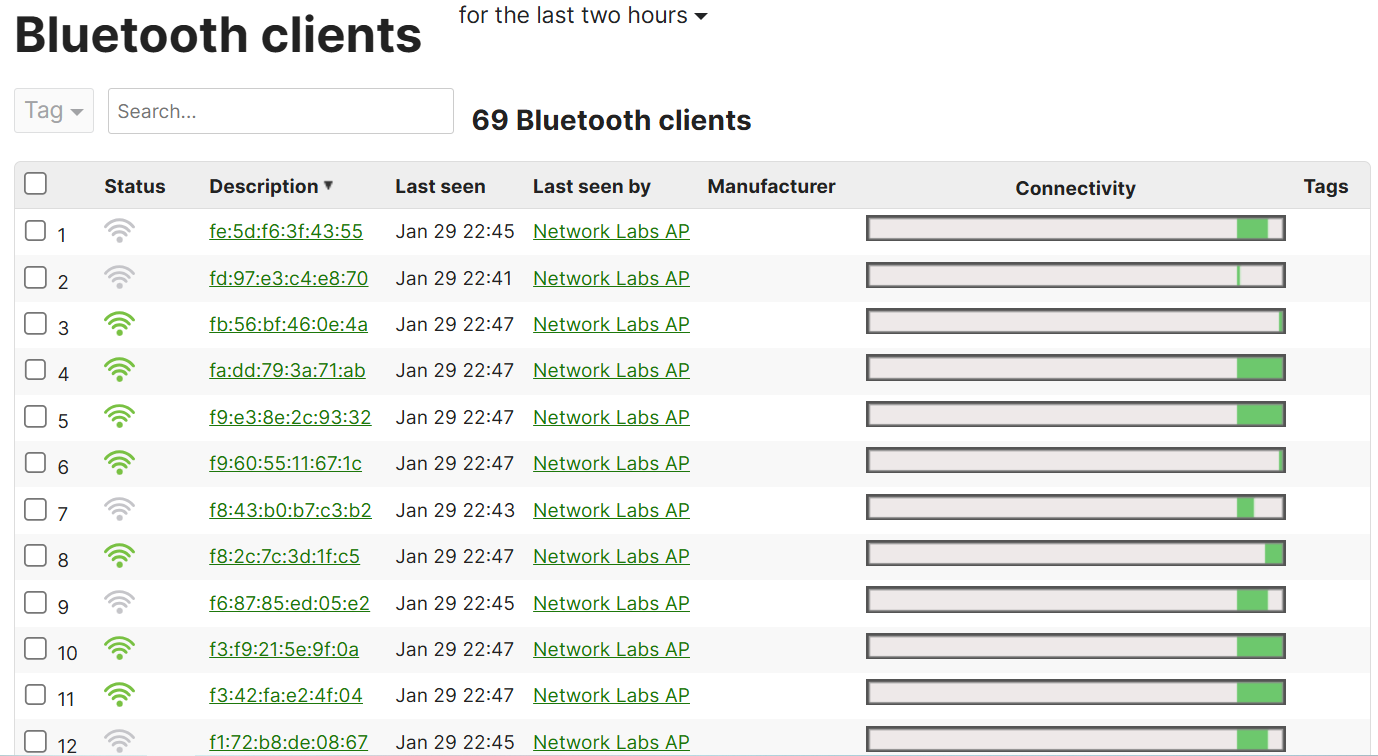
Bluetooth Clients Menu

Registered Bluetooth Clients Overview
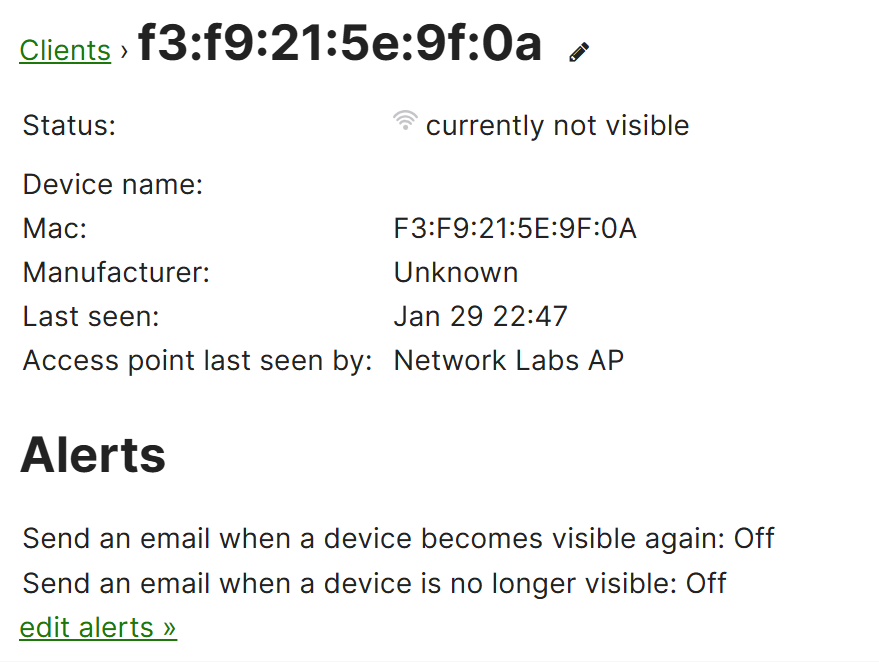
Individual Bluetooth Device Overview
Ability to set Alerts for analytical and tracking purposes
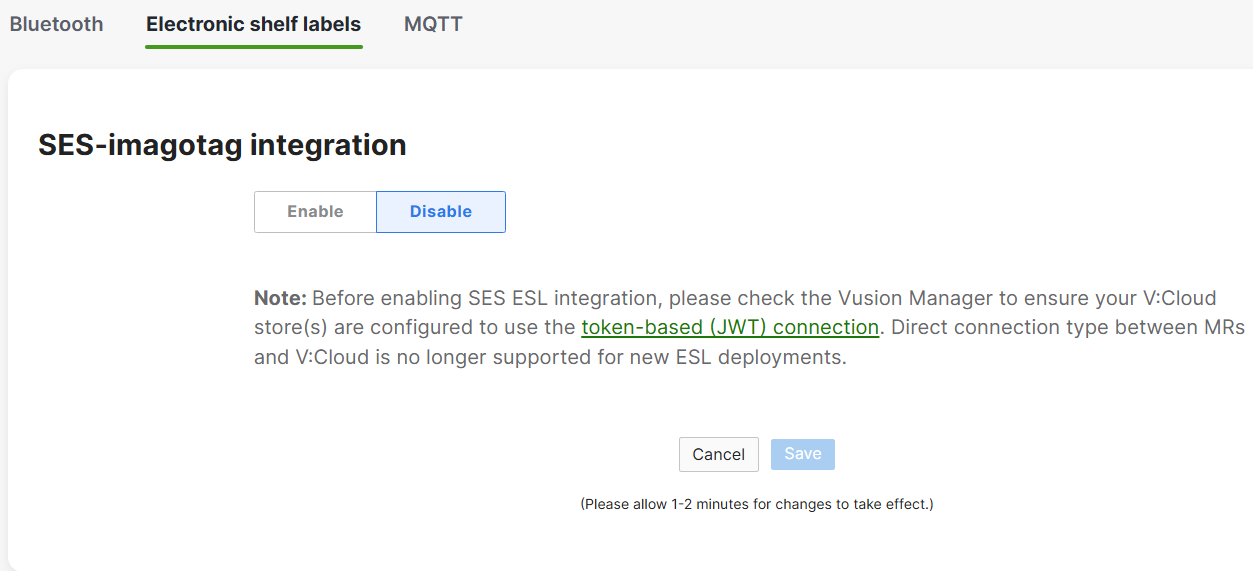
SES-Imagotag Integration Overview:
- SES-imagotag integration for Meraki's Electronic shelf label solution refers to a partnership that allows seamless integration of digital price tags referred to as ESLs
- SES-imagotag is a leading provider of ESL technology, which is used in environments for dynamic price display, product information, and promotions on store shelves
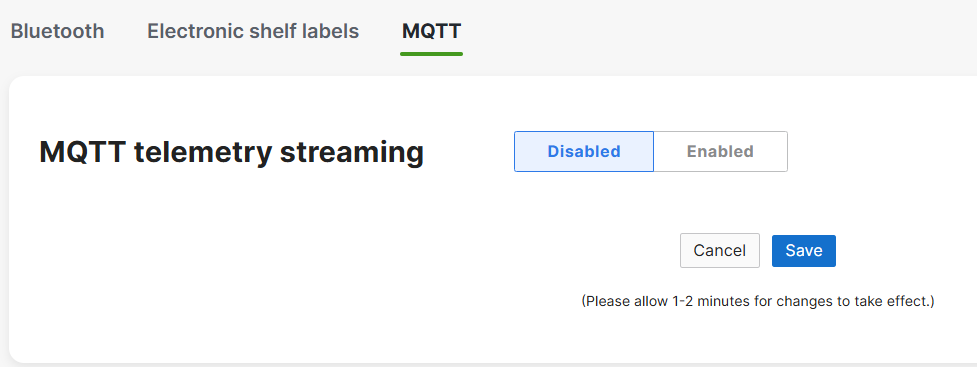
MQTT Telemetry Streaming Overview:
- MQTT Telemetry Streaming in Cisco Meraki MR access points refers to the capability of the access points to transmit telemetry data such as network performance metrics, client stats, device health, and etc to an external MQTT (Message Queuing Telemetry Transport) broker in real time
- MQTT is a lightweight messaging protocol designed for low bandwidth, high latency, and unreliable networks, making it ideal for real time telemetry and IoT applications
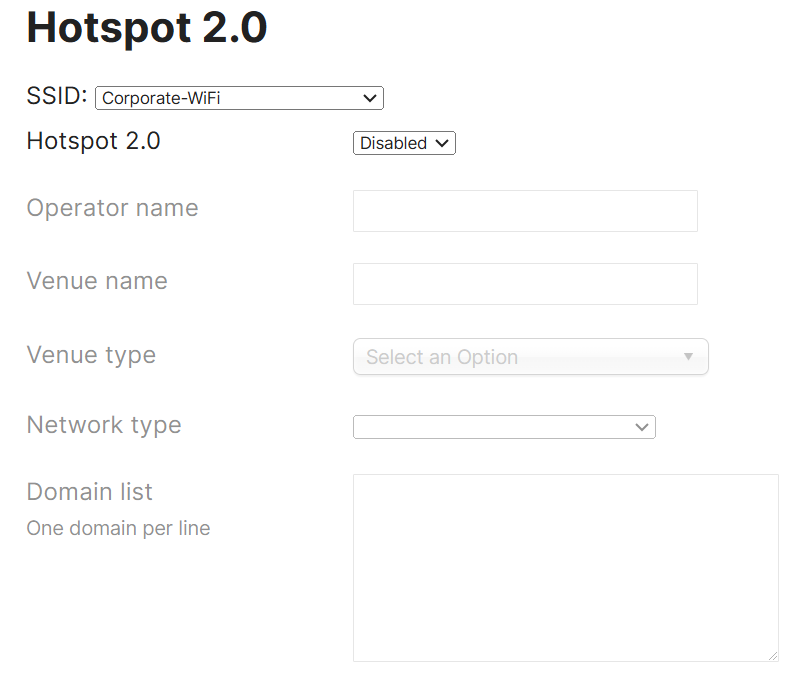
Hotspot 2.0 Settings
Overview:
- Hotspot 2.0 is a service provider feature supported by Cisco Meraki MR access points that enhances the user experience by enabling seamless, secure, and automatic Wi-Fi roaming across networks
- Hotspot 2.0 is often used in locations like airports, hotels, and other public spaces that provide free or paid Wi-Fi services
- Hotspot 2.0 allows devices to automatically discover and connect to available networks without requiring manual intervention, therefore allowing devices to roam from one AP to another without disruptions
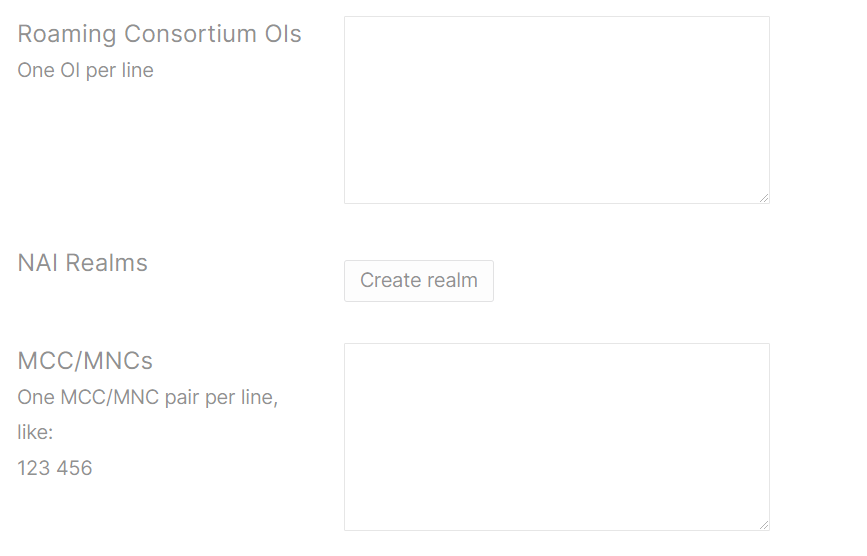
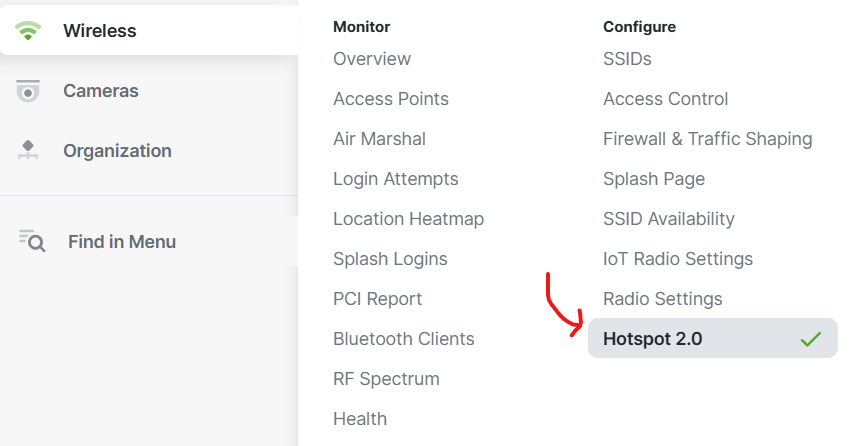
Hotspot 2.0 Menu
Hotspot 2.0 Settings Overview